| Prev | ICM User's Guide 17.7 Data Clustering | Next |
[ Cluster | Tree Select | Save and Print | Tree View ]
ICM allows you to create hierarchical clusters for chemical and other objects. Cluster trees can be used for:
- Navigation through large data sets.
- Selecting group representatives (taxons).
- Filtering tables to exclude redundancy.
- Finding similar elements, and more.
- Creating hierarchical views of data sets in many different styles, with subsequent image export/printing ability.
17.7.1 Cluster |
| Available in the following product(s): ICM-Chemist | ICM-Chemist-Pro | ICM-VLS |
To perform clustering based on chemical similarity or any other data you must have an SDF file or table loaded into ICM.
- Right click on the table and select the Clustering option OR select the Chemistry menu and choose the option entitled Cluster Set.
- Tools/Table/Clustering.
A data entry box as shown below will be displayed.
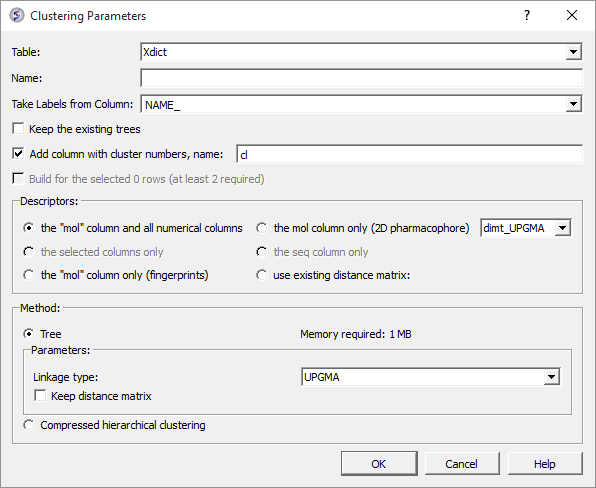
- Select the table you want to cluster from the drop down menu.
- Give the tree a name.
- Select the column you would like to use to label the tree (this can be changed or appended to once the tree has been made - right click on tree and choose "Change Record Labels".
- You can choose to keep the existing tree.
- The cluster number names will be added to your table - you can change the label of the columns (default = cl).
Now select the descriptors you wish to use for clustering.
- The "mol" column and all numerical columns.
- The "mol" column only (2D pharmacophore)
- The selected columns only.
- The sequence column only.
- The "mol column only ( fingerprints).
- Use existing distance matrix. UPGMA is a linkage method which is used to group tree nodes together. (they are described in the link below). dimt_UPGMA is used when 'use exiting matrix' mode is selected. It can be any exiting matrix. This usually comes from previous clustering if 'Keep distance matrix' option was selected
Select the method you wish to use for clustering.
- UPGMA (unweighted pair group method using averages): Distance calculated is the average of all elements (recommended). https://en.wikipedia.org/wiki/UPGMA
- Single linkage: Nearest neighbour linkage - https://en.wikipedia.org/wiki/Single-linkage_clustering
- Complete linkage: Furthest neighbour linkage - https://en.wikipedia.org/wiki/Complete-linkage_clustering
- WPGMA: (weighted pair group method using averages): Rough approximation of weighted (slightly faster)
- Farthest https://en.wikipedia.org/wiki/Complete-linkage_clustering
- Ward: https://en.wikipedia.org/wiki/Ward%27s_method
- UPGMC: Centroid linkage clustering
- UPGMC-corr: Correlation clustering provides a method for clustering a set of objects into the optimum number of clusters without specifying that number in advance.
| NOTE If you wish to cluster a selection of a table; first select the compounds you wish to cluster (Ctrl A will select all or see the section of the manual entitled making table selections. |
Check the option "Keep Distance Matrix" if you wish the Distance Matrix to be saved.
17.7.2 Tree Selection |
A number of different selections can be made once the tree has been created.
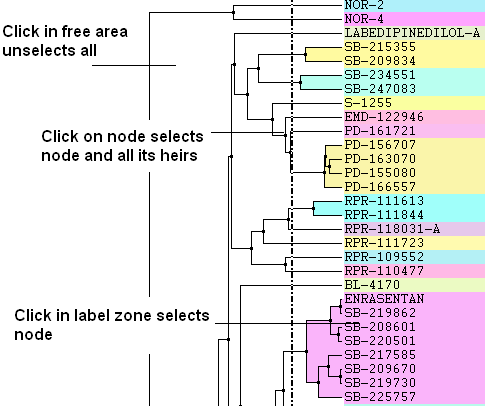
- Click in free area unselects all.
- Click on node selects node and all its heirs.
- Ctrl+click adds to (if not selected yet) or removes from (if already in selection) current selection.
- Shift plus click allows a range to be selected.
- Click in label zone selects node.
- Keyboard "Up"/"Down" cursor keys move selected node up/down in the tree. With Shift held the selection expands in the according direction.
- Keyboard "Escape" unselects all.
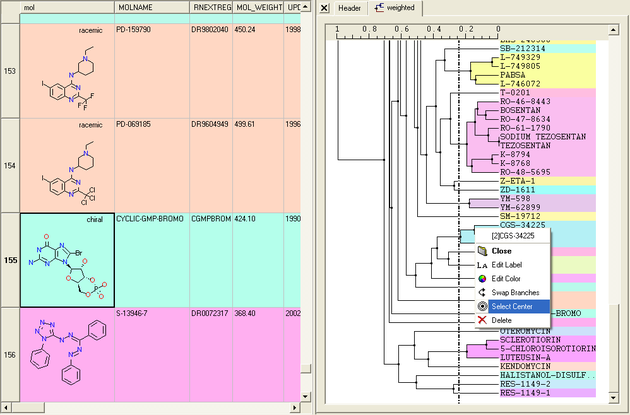
Select Center Representatives From a Node.
To select the "center" representative compound or value from a cluster.
- Right click in the free area of the tree and select the option "Select Centers".
NOTE: Selections in the tree will be highlighted in blue in the tree and in the table.
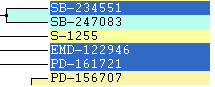
|
Copy selection to new table.
All selections can be copied to a new table by:
- Right clicking on the selected rows in table and a menu will be displayed.
- Selecting the "copy selection to ICM table" option.
17.7.3 Save and Print Tree |
To save a tree
Option 1:
- Save the whole session as an ICM project. See Saving an ICM project
Option 2:
- Save the table as an .icb file. Right click on table header and select "save as".
To save a tree as a picture
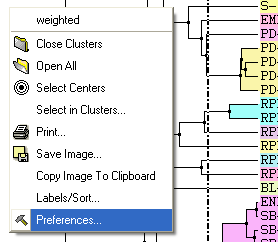
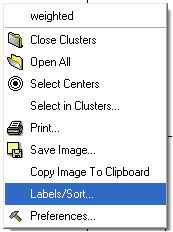
- Right click in the "free area".
- Select "Save Image..."
The image of the tree can also be saved to the clipboard.
- Right click in the "free area".
- Select "Copy Image to Clipboard"
To print the tree
- Right click in the "free area".
- Select "Print"
17.7.4 Tree View |
A number of changes to the tree view can be made by right clicking in the tree "free area" and selecting preferences as shown below.
A preferences window as shown below will be displayed.
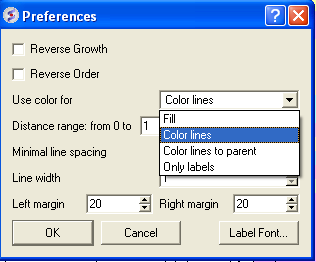
Reverse Growth:
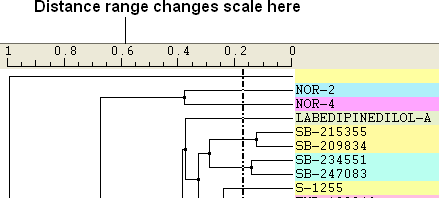
Distance Range:
Color Preferences:
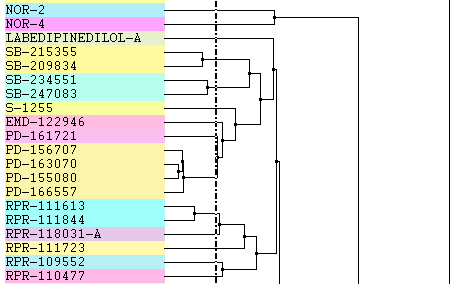
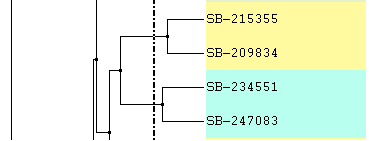
|
Left: Fill Right: Color Lines
|
Left: Color lines to parent Right: Only labels
Increase or Decrease Line Spacing:
Increase or Decrease Line Width:

Change Font and Margins:
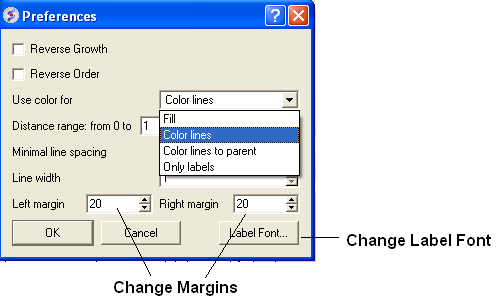
Change Label
To change the tree labeling (GLOBAL):
* Right click in the "free area" and select the Label/Sort option.
A window as shown below will be displayed:
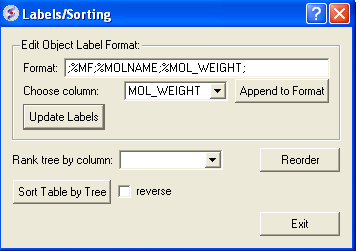
- Choose the column name you wish to label the elements of your tree.
- Click the Append to Format button. You may wish to delete some of the information in the Format data entry box if you do not wish that column header to be displayed. Note more than one column header can be used as a label.
- Click the update labels button to view the changes.
To change the tree labeling (NODE):
- Right click on the node you wish to change the label of and select "Edit Label" and a data entry box as shown below will be displayed.
- Enter the new label.
Change Node Coloring
To change the color of a node:
- Right click on the node you wish to change the color of and select "Edit Color".
- Select the desired color and click OK.
| Prev Learn and Predict | Home Up | Next Standard |