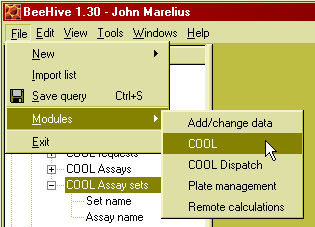
Figure n: Use the Modules sub-menu to load or unload BeeHive modules.
The Add and change data features are a module in BeeHive, a component that can be enabled (loaded) or disabled (unloaded) by you as a user. Before you can use the Add/change data module, you must load it.
You only need to do this once, the next time you start BeeHive, the
Add/change data module will be loaded at start-up.

Figure n: Use the Modules sub-menu to load or unload BeeHive modules.
Much of Biovitrum's assay data that you see in BeeHive is imported automatically and continuously from ActivityBase. However, some database tables are designed so that you can type in data or import data from a text file. You will be able to add data only if you have been granted that permission for a particular table.
In the sub-menu "Add" of the "Data" menu you will see the
names of tables where you may add data.
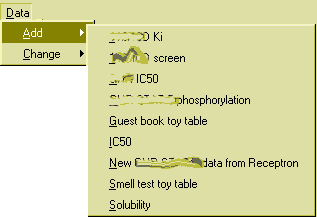
Figure 24: The add data menu shows where you have permission to add data.
To open the add data module, select a table name from the "Add"
submenu of "Data".
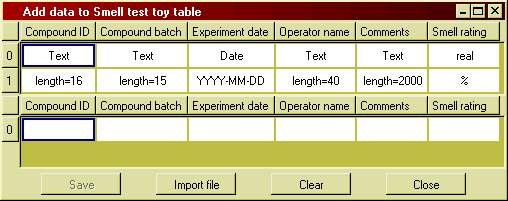
Figure 25: The add data module.
The upper part shows the data type and unit of measurement or maximal length of each column. Type lower part is where you may type in new data.
When you are ready to save the new data to the database, press
"Save". You will be asked to confirm adding the new rows of data.
BeeHive will attempt to send the new data, row by row, to the database server.
The server will further validate the data, e.g. by checking that compound IDs and batch
numbers are valid. If there is a problem with the validation of the data, a
message will appear:
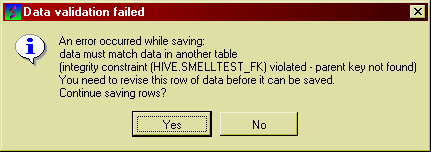
Figure 26: Notification of a data validation failure.
The cursor in the add data window is placed on the row causing the problem. Press "Yes" to skip this row and continue processing the other rows.
Note that if you press "No" to stop processing, all rows prior to the error have already been saved. Take care not to add them another time!
Each row that is successfully saved is removed from the add data window. This means that when the processing completes, there the window will either be empty - if all rows were OK, or rows causing errors will be left. This makes it easy to find and correct the errors. Simply press save again when you have corrected the problems.
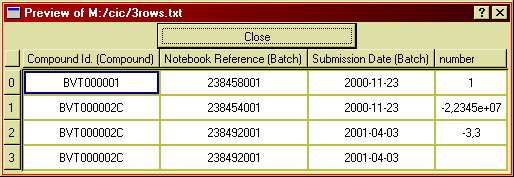
To import data from a text file, the file must meet these requirements:
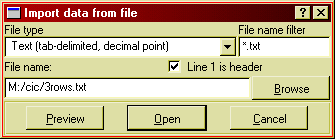
Follow this procedure to import a file:
Changing data in database tables works in a manner similar to adding data. Select the name of the table you want to update from the "Change" sub-menu of the "Data" menu. All the contents of that table will appear in a "Change data" window.