| Prev | ICM User's Guide 7.3 View-Defined Movie Making | Next |
[ Movie Files | Start | Still | Tween | Rotate | Rock | Edit | Prev & Export ]
Before starting to make a movie:
1. First set up and make a directory into which you wish to store the movie.
2. Read the PDB files and objects you wish to include in the movie
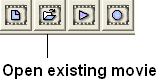
A previously saved movie can be opened by:
- Clicking on the movie open button shown below.
7.3.1 Movie Files and Resolution Setup |
To start making a movie:
- Select the movie tab.
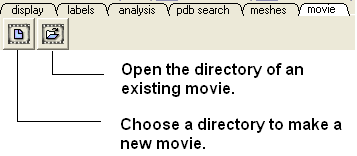
- Click the button to choose a new movie directory (See Figure Above).
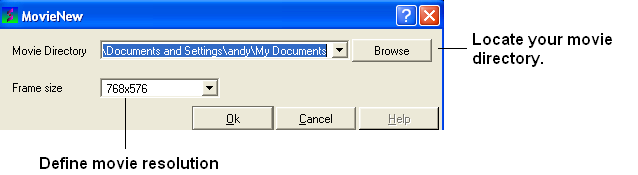
- Browse for your movie directory.
- Select which resolution you desire for your movie by selecting the appropriate frame size.
- Click OK.
7.3.2 Defining a Movie Scene |
The first step is to make the first scene.
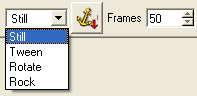
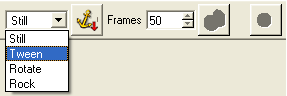
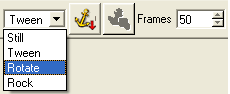
There are four choices of scene - still, tween, rotate or rock.

Select which scene you would like to start your movie with and follow the instructions for whichever one of the four scenes you choose.
7.3.3 Still |
To make a still scene:
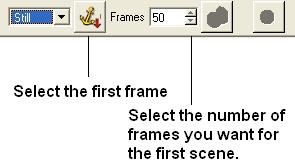
- Select the still option from the drop down list shown below.
- Move the object to the starting position.
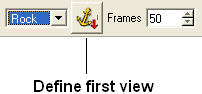
- Click on the "Define first view" button (see figure below).
- Type in the data entry box how many frames you desire for the scene.
- If you wish to preview the still view click the "preview" button (see figure below)
- If you are happy with the scene, click the red record button.
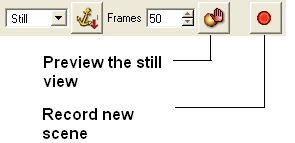
The number of scenes you have recorded so far is displayed in the video panel (see figure below).

7.3.4 Tween |
To make a "tween" scene (moving your object from one point to another):
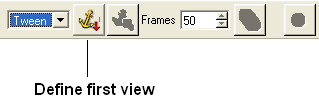
- Select the tween option from the drop down list shown below.
- Move the object to the starting position.
- Click on the "Define first view" button (see figure below).
- Type in the data entry box how many frames you desire for the scene.
- Move the object to the place you wish it to be translated to..
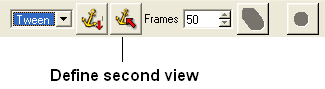
- Click on the "Define second view" button (see figure below).
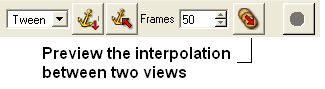
- Click on the button shown below to preview the interpolation between the two views.
- If you are happy with the scene, click the red record button.

The number of scenes you have recorded so far is displayed in the video panel (see figure below).

7.3.5 Rotate |
To make a "rotation" scene:
- Select the rotate option from the drop down list shown below.
- Move the object to the starting position.
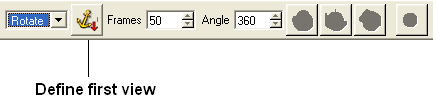
- Click on the "Define first view" button (see figure below).
- Type in the data entry box how many frames you desire for the scene.
Now you have three preview options
- Rotate around the x axis.
- Rotate around the y axis.
- Rotate around the z axis.
The buttons for each of the three options are shown below:
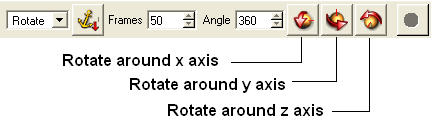
- Enter by how many degrees you wish your object to be rotated.
- Click one of the three preview options - rotate x, rotate y and rotate around the z axis.
| NOTE You can play with and change the number of degree option and which kind of rotation as many times as you wish until you are satisfied with your scene. |
Once you are satisfied with your scene:
- Click the red record button.

The number of scenes you have recorded so far is displayed in the video panel (see below).

7.3.6 Rock |
To make your object perform a "rock" motion:
- Select the rock option from the drop down list shown below.
![]()
- Move the object to the starting position.
- Click on the "Define first view" button (see figure below).
- Type in the data entry box how many frames you desire for the scene.
Now you have three preview options
- Rock around the x axis.
- Rock around the y axis.
- Rock around the z axis.
The buttons for each of the three preview options are shown below:
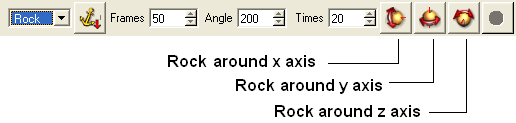
To change the angle and the number of times the rock occurs, enter the desired numbers in the data entry boxes shown below.

Once you are satisfied with your scene:
- Click the red record button.

The number of scenes you have recorded so far is displayed in the video panel (see below).

7.3.7 Edit a Movie |
To edit a movie:
- Select the scene you wish to edit by using the buttons shown below. The scene number is displayed in the movie panel.
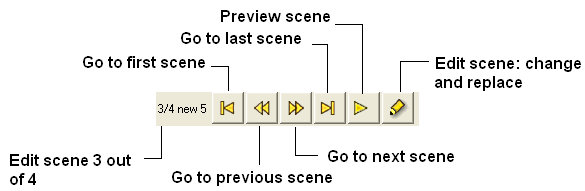
- Click the "Edit scene: Change or replace scene" button.
- Make changes to the scene as described in the Movie Making section of this manual.
7.3.8 Preview and Export |
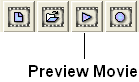
To preview a movie:
- Click on the preview movie button shown below.
To export a movie to a series of png,gif,tiff files or an avi file:
- Click on the export movie button shown below.
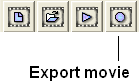
- Select which format you wish to save your movie.

If you select avi a window as shown below will be displayed:
- Select which windows compression software you wish to use to make the movie.
| Prev Screen-grabbing Movie | Home Up | Next Movie Making Options |