Google Search: Keyword Search:
| Prev | ICM User's Guide 21.11 Virtual Ligand Screening Tutorials | Next |
[ VLS - Ricin | VLS - Cyclooxygenase | Docking a Markush Generated Library ]
21.11.1 Virtual Ligand Screening to Ricin Receptor |
| Additional Resources: GUI Docs | Command Line Docs | Video |
Objective
To perform virtual screening into the ricin receptor.
Instructions
- Docking> Set Project (select RICIN) see previous lesson Re-Dock an Inhibitor to Ricin Crystal Structure.
- Docking> Tools> Index Mol/Mol2 file/database (Input file . select ricinLigands2D.sdf, )
- Docking> Ligand Setup> From Database (select mydb.inx, check .mol., .build hydrogens. .assign charges. and .2D to 3D. convert)
- Docking > Run Docking Batch
- Docking > Make Hit List (select import 2D from DB)
- Browse HITLIST table
21.11.2 Virtual Ligand Screening to Cyclooxygenase |
Objective: To dock perform virtual screening of a database of COX 2 inhibitors into the Cyclooxygenase receptor.
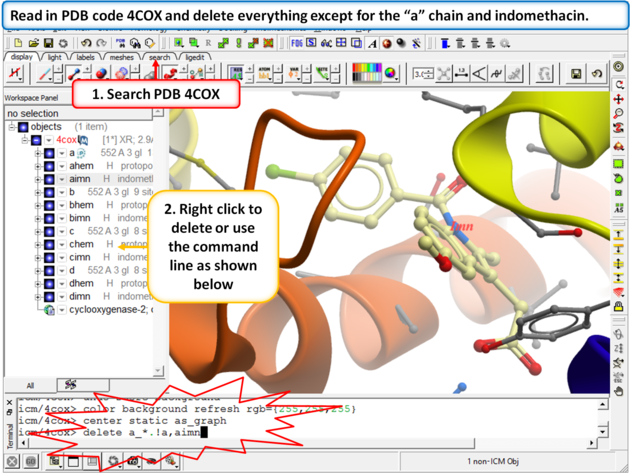 |
Step 1:
|
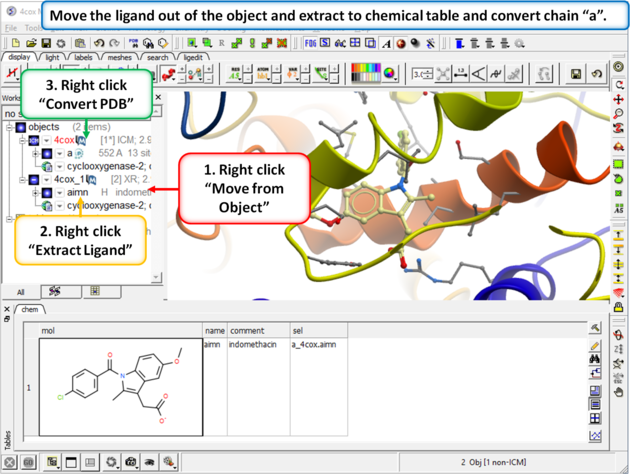 |
Step 2:
|
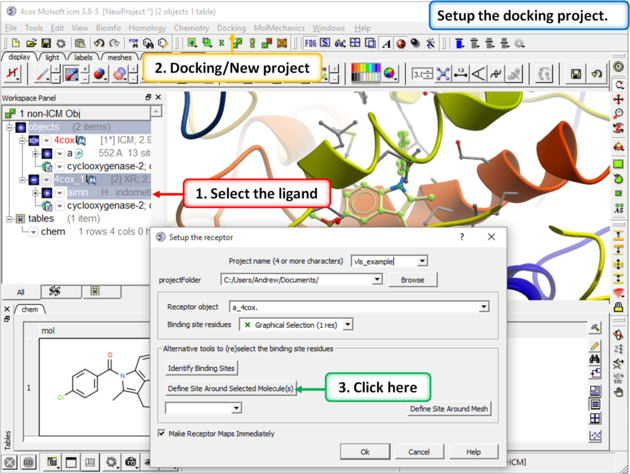 |
Step 3:
|
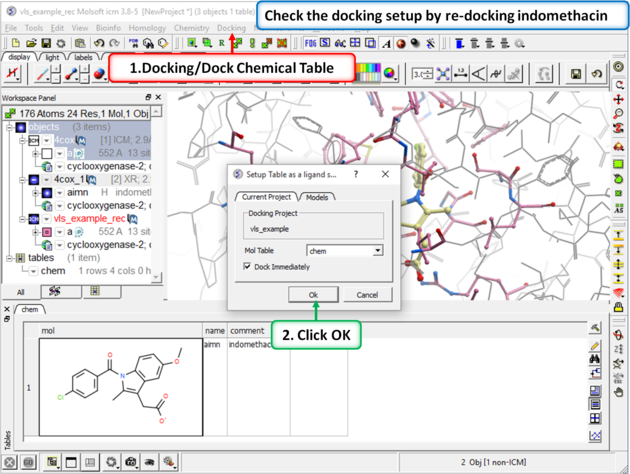 |
Step 4: Redock indomethacin to check the docking setup is OK for virtual ligand screening.
|
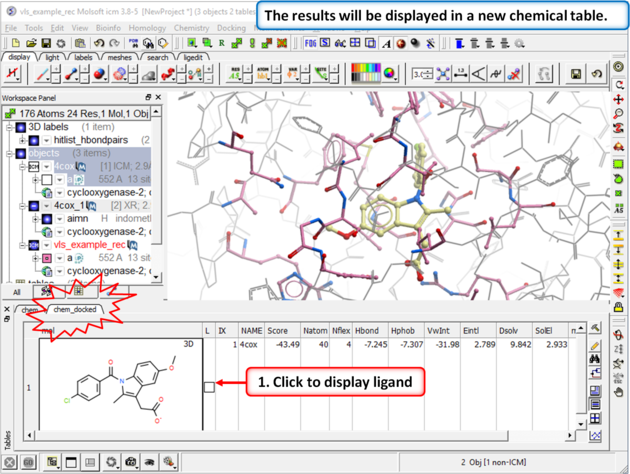 |
| Step 5: The docking results will be displayed in a new table. Compare the docked ligand with the crystal structure ligand we used for setting up the project. Use the toggle display button in the table to view the docked pose of indomethacin. Optional - you could also try docking Vioxx into the receptor in the same way. In the ICM distribution (cd $ICMHOME or C:Project Files/MolSoft LLC) you can find a file called vioxx.sdf. If you cannot find this file please E mail support@molsoft.com and we can send it to you. Compare the docked pose of Vioxx with the crystal structure 1cx2. |
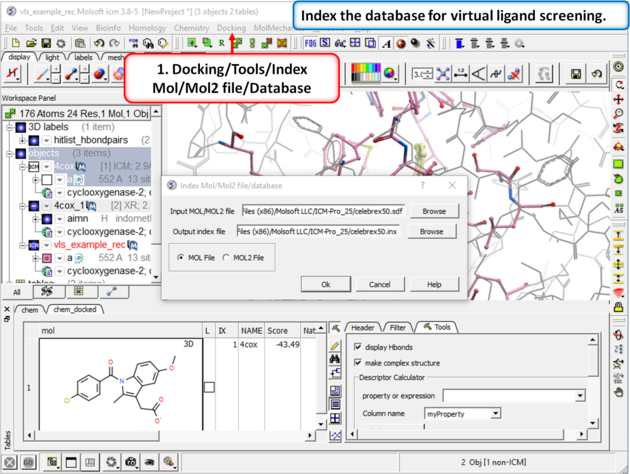 |
Step 6: Virtual Ligand Screening First we need to index the sdf file for screening.
|
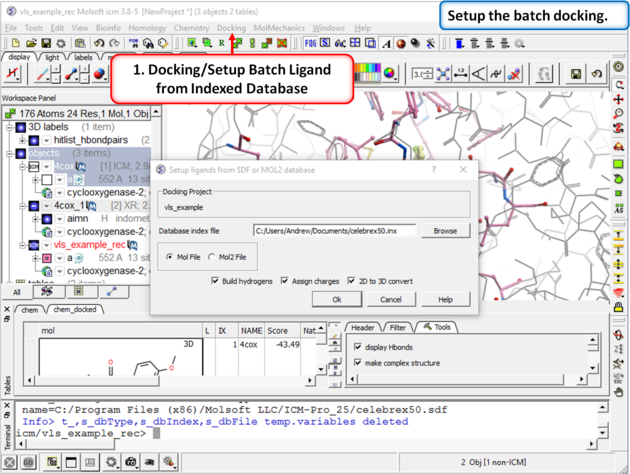 |
| Step 7: Docking/Setup Batch Ligand from Indexed Database |
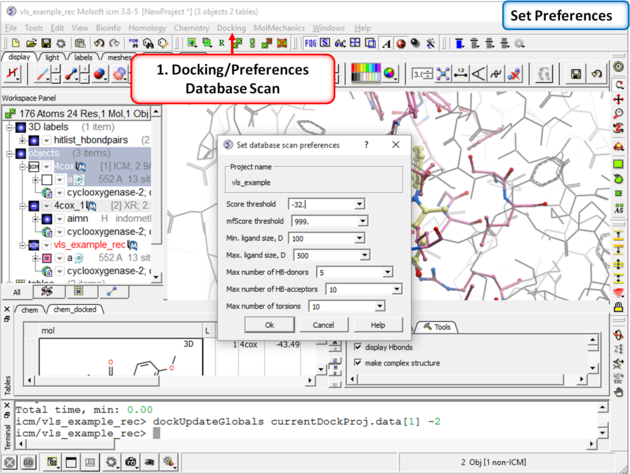 |
| Step 8: Check the preferences before running the VLS. Any ligand that falls outside of the filters will not be stored (e.g. a chemical scoring >-32 will not be stored). |
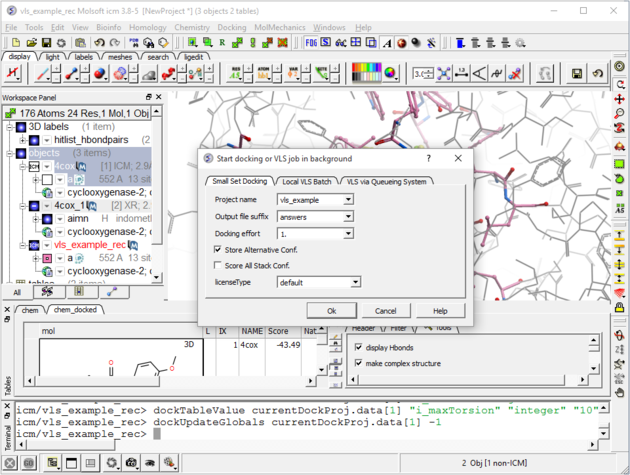 |
| Step 9: Set the Screen Running Docking/Run Docking/VLS Batch (use the small set batch tab). You can check up on the progress of the docking by selecting Windows/Background Jobs. A messsage will be displayed on the screen when
the docking is finished.
|
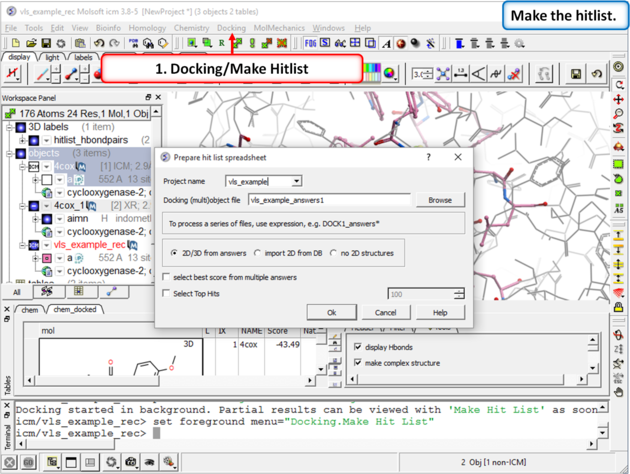 |
| Step 10: Make a Hitlist When the docking has finished a dialog box for making the hitlist will be displayed automatically. Alternatively you can go to Docking/Make Hitlist. A hitlist can be prepared at any time during the screen. |
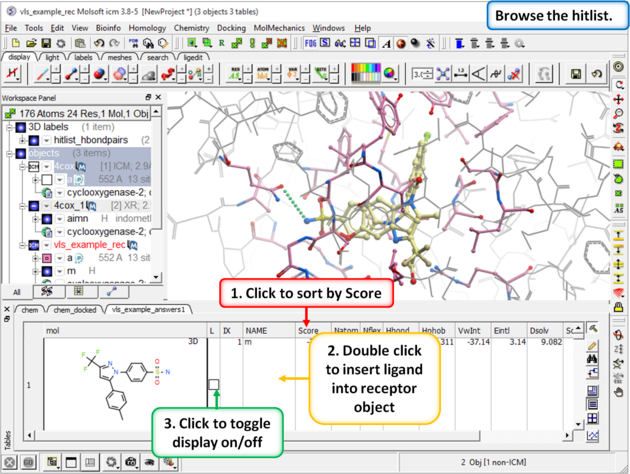 |
| Step 11: Browse the Hitlist Sort the hitlist by score and browse the top hits. The hitlist can be clustered or you can use the post-screening tools for data analysis. Although it depends on the target a score of -32 and lower are generally considered good scores - but depends on the receptor (e.g. exposed pockets or pockets with metal ions may have higher scores than -32). In this example we can compare the score with known inhibitors that we have already docked (Indomethacin and Vioxx). |
21.11.3 Docking a Markush Library |
Background Once a lead compound has been identified by virtual screening, experimentally tested for activity and crystallized to confirm the docked pose then you may want to try and optimize the compound by modifying the scaffold and improve the ligand-receptor interactions. One way to do this is to enumerate a Markush library and dock that but a more direct and quicker method is to generate a focused Markush library and then dock on the fly. In this example we will use the roscovitine ligand bound to CDK5 as a scaffold to generate a focused Markush library and then identify compounds which may have better receptor interactions than roscovitine.
Step 1: Load the PDB File and Convert to ICM Object
- Select the PDB Search tab and enter pdb code 1UNL.
- Delete the subunits we are not interested in. Delete "b", "d","e" and "W" (water) by double-clicking on the subunits in the ICM Workspace whilst holding the CTRL key. This will select the subunits (highlighted blue in the ICM workspace and green crosses in the graphical display) and then right click and select Delete.
- MolMechanics/ICM Convert/Protein select optimize hydrogens and display the result.
Step 2: Inspect the ligand binding pose and identify positions to add new substituents.
- Right click on the ligand which is abbreviated to "arrc" in the converted object in the ICM workspace and select Ligand Pocket.
- The ligand roscovitine has a purine scaffold and there are a couple of places where substituents could be placed in order to improve ligand-receptor interactions.
- In this example we will add two R-groups (see next step).
Step 3: Extract the ligand and draw Markush structure
- Right click on the ligand "arrc" in the converted object in the ICM workspace and select Extract Ligand and choose the extract 2D drawing option. The sketch will now be displayed in an ICM chemical spreadsheet.
- Right click on the sketch of the compound and select Edit Molecule
- Use the delete button and add R groups options in the Molecular Editor to edit the scaffold as shown below.

- Close the Molecular Editor window by clicking on the cross in the top right hand corner and the changes will be submitted to the table.
- The sketch in the chemical spreadsheet is named "chem" by default. For this example we will rename it "scaffold". You can rename it by right clicking on the table tab and selecting rename.
Step 4: Create Markush Combinatorial Library
- Read in a table of substituents. For this example we will use an sdf file called combiDock_R1.sdf - this can be found in the ICM distribution (File/Open). If you cannot find this file please E mail support@molsoft.com and we will send it to you.
- Chemistry/Create Modify Markush and enter the data as shown below and press next.

- Enter the name of the table containing substituents for R1 and R2. In this example we will use the same table combiDock_R1 for R1 and R2 as shown below. You can use the drop down arrows to select the table you require.

- Once the tables are selected press Create and a new chemical table will be displayed with the markush structure annotated with the substituents for R1 and R2 as shown below.

Step 5: Dock Markush Combinatorial Library
- Move the ligand from the converted object so that we can dock in that position. To do this right click on the ligand (arrc) in the converted object and select "move from object".
- Docking/Project Name Enter a name for the project e.g. cdk5
- Docking/Receptor Setup - enter the data as shown below. To select the residues around the ligand. Double click on the converted ligand in the ICM Workspace to select it and then press the button labeled Define Site Around Selected Ligand.
- Click OK.

- In this example there is no need to change the position of the probe or the size of the purple box. Click on the GO button (bottom left hand corner) to proceed to the preparation of maps. The generation of maps usually takes a couple of minutes.
- Docking/Setup Batch Ligand/ Markush Combinatorial Library
- Enter the name of the table containing the Markush structure.
- In this example we are going to first enumerate the Markush library by exploring one Rgroup at a time rather than a full enumeration. The substituent table (combiDock_R1) has 8 groups and with the "one at a time" option a hydrogen will be placed on one Rgroup whilst the other 8 groups are substituted on the other R group. Therefore in this case we will dock 16 compounds rather than 64 with the full enumeration. This option is particularly useful if you have many hundreds of substituents and this is a shortcut to save you from docking all of them. You will see in the next steps that docking score will be used to evaluate which substituents have good receptor interaction and then only the good substituents are used for full enumeration.
- We know the correct binding pose of the main scaffold of our Markush structure and therefore we will select the docking to template option (Use template). The template option will match the substructure of the Markush and use this as a template. To choose the template select the original ligand from the drop down menu. In this example the ligand is defined in the ICM selection language as - a_1unl.arrc (see screenshot below).
- Click OK.
- Docking/Run Docking Batch

Step 6: Make a focused Markush library
- When the docking is complete make a hitlist Docking/Make Hit List.
- Sort the hitlist by Score. You can sort a column by right cliking on the column header and selecting sort.
- In this example we will delete all compounds that scored higher than -15. To delete a row select it by clicking on the row header and then right click on the row header and select Delete Row. At this point you should be left with ~9 compounds.
- Click on the button on the right hand side of the hitlist labeled make focused Markush (see below). If you do not see this panel - Right click on the table and select Table View/ View Extra Panel.

- A focused library based on the substituents contained within the top-scoring hits will be generated and displayed in a chemical table entitled focusedMarkush as shown below.

Step 7: Dock focused Markush library
- Docking/Setup Batch Ligand/ Markush Combinatorial Library
- Enter the name of the table containing the focused Markush structure.
- Select Full Enummeration this time for the focused Markush library.
- Select the template as before.

- Docking/Run Docking Batch
Step 7: Evaluate results
- When the docking is complete make a hitlist Docking/Make Hit List.
- Sort the hitlist by Score. You can sort a column by right cliking on the column header and selecting sort.
- If everything went well the top two hits should be as shown below.

The 2nd compound on the list is the original ligand in the 1UNL structure of CDK5 whilst the generation and screening of a Markush based library has led to the identification of a better binder in terms of ICM score. The compound ranked one has a bromine attached to a ring in the R1 position.
- Let us view how the bromine is interacting with the receptor.
- Docking/Display/Property Skin
- Click OK and a skin surrounding the pocket will be displayed.
- Double click on the top-scoring compound in the hitlist and it will be displayed in the pocket. To zoom into the pocket click on the ligand in the ICM Workspace and then press the center button. You will see that the bromine is making a contact with the hydrophobic part of the pocket (colored green) and thus improving the interactions with the receptor compared to the original ligand scaffold.

| Prev Protein-Protein Docking | Home Up | Next Induced Fit (Flexibility) Docking Tutorials |