| Prev | ICM User's Guide 3.6 Tab Guide | Next |
[ Display Tab | Light Tab | Labels Tab | PDB Search Tab | Meshes Tab | Movie Tab ]
In this section we describe the contents of the tabs in the graphical user interface.

3.6.1 Display Tab |
The display tab contains tools for a variety of functions including - structural representations, coloring, labeling and superposition. This tab is shown below.
![]()
3.6.2 Light Tab |

The options in this tab are described in the Lighting Section.
3.6.3 Labels Tab |

The options in this tab are described in the labels section of this manual.
3.6.4 PDB Search Tab |
[ PDB | Query | PDB Search Results Table | Patern | Sensitive | Results | Load | Pdb html | Convert ]
The PDB search tab provides easy access to the PDB database. You can use keyword searching or type in the PDB code you are interested in. An asterisk (*) wildcard can be used to list all the pdb files currently available in the protein databank. Different fields can be searched by using the drop down arrow as shown below. More advanced PDB search tools and how to use the PDB search result table are described in the section entititled Searching the PDB.
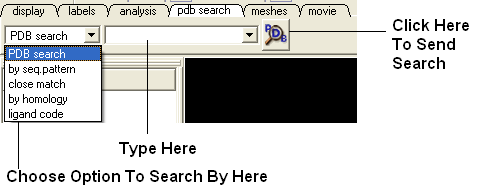
Once a search is complete a table of PDB files relating to your search query will be displayed. To view the PDB file in 3D in the graphical display double click on a row in the PDBSearchResults table.
| NOTE: If you have a PDB structure already saved you can read it into ICM by going to the File Menu and selecting Open. PDB files that have been viewed previously can be loaded using File/ Recent PDB Codes. |
3.6.4.1 Searching the PDB |
Protein structures solved by X-ray crystallography, NMR or other experimental methods are stored in the Protein Data Bank (PDB). These structures can be easily accessed, displayed and analyzed using ICM.
There are four ways to find a structure from the PDB database and load it into ICM:
- Query by keyword or PDB code.
- Query by sequence pattern.
- 2Query by sensitive similarity search.
- Load the PDB file directly from FTP, http, local drive.
3.6.4.2 Querying PDB by Keyword or PDB Code |
There are four ways of querying the PDB using ICM and keywords. OPTION 3 allows for a much more refined search.
OPTION 1:
- Select Edit/PDB search and the "Find PDB Entries by Keyword" data entry window will be displayed.
- Enter a keyword or PDB code into the Keywords data entry field.
| NOTE: If a keyword has been entered previously it will be available by clicking on the drop-down button. |
- Click the OK button and a list of related PDB entries will be displayed in the PDBSearchResults table of the graphical userinterface.
OPTION 2:
Use the pdb search tab on the tool bar. Select which parameter you wish to search by. Enter some text and this will be searched against the PDB.
Seq Pattern- Enter a protein sequence and this option will tell you whether a protein structure exists in the PDB for that sequence.
Close Match - Enter a protein sequence and this option will tell you which sequences are similar to your entered sequence.
Homology - Enter a protein sequence and homolopgous proteins in the PDB will be displayed in a table.
Ligand Code - Enter the PDB ligand code.(e.g. 1crn)

- Click the OK button and a list of related PDB entries will be displayed in the PDBSearchResults table of the graphical userinterface.
OPTION 3:
- Select Edit/PDB search by field and the ** Find PDB Entries by Keywords and Fields ** data entry window will be displayed.
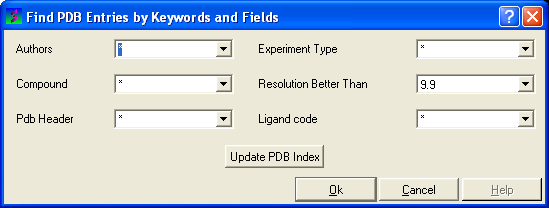
- Enter your search words into the appropriate fields: Author; Compound; PDB Header; Experiment Type; Resolution Better Than
- Click the OK button and a list of related PDB entries will be displayed in the PDBSearchResults table of the graphical userinterface.
OPTION 4:
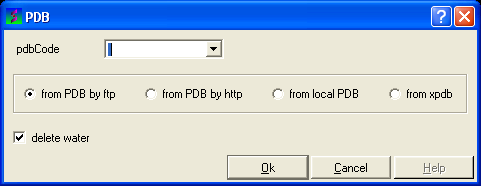
- Select File/Load and the PDB data entry window will be displayed.
- Enter the PDB code and select the source of your PDB file.
- Click the OK button and a list of related PDB entries will be displayed in the PDBSearchResults table of the graphical userinterface.
3.6.4.3 PDB Search Results Table |
- To load a pdb file double click on the search results table.
- Sort the table by right clicking on the column header. Other table manipulation options are described in the Working with Tables chapter.

3.6.4.4 Querying PDB by Sequence Pattern |
There are two ways to query the PDB by sequence pattern.
OPTION 1:
- Select Edit/PDB Search by sequence pattern
- Cut and paste or type your sequence into the Sequence data entry field.
- Choose whether you wish to display All entries or Entries with unique sequence by checking the appropriate button.
- Click the OK button.
OPTION 2:
Use the word search option on the tool bar

3.6.4.5 Sensitive PDB Similarity Searches |
There are two ways to search a sequence against the PDB database.
OPTION 1:
If your sequence is already loaded into ICM:
- Select Edit/PDB Search by sensitive similarity
- Type the sequence name into the Sequence name field. Sequences which are already loaded into ICM can be seen by clicking the drop-down button
- Select the number of hits you wish to see by typing the number into the Limit field. A number can also be selected by clicking on the up and down arrows. (Default is 50)
- Select the sensitivity of your search by typing a value into the Expect field. This value is a database-size error estimate and the default value is 0.01.
- Choose whether you wish to display All entries or Entries with unique sequence by checking the appropriate button.
- If you wish to load the sequences leave the Load Sequences box checked.
- If you merely want to see the PDB codes which are similar to your sequence then un-check the Load Sequences box.
- Click the OK button.
OPTION 2:
If your PDB sequence is not loaded into ICM:
- Select Edit/Search with external sequence
- Cut and paste or type (shown below) your sequence into the Sequence data entry field.
- Select the number of hits you wish to see by typing the number into the Limit field. A number can also be selected by clicking on the up and down arrows. (Default is 50)
- Select the sensitivity of your search by typing a value into the Expect field. This value is a database-size error estimate and the default value is 0.01.
- Choose whether you wish to display All entries or ** Entries with unique sequence ** by checking the appropriate button.
- If you wish to load the sequences leave the Load Sequences box checked.
| NOTE: If you merely want to see the PDB codes which are similar to your sequence then un-check the Load Sequences box. |
- Click the OK button.
| NOTE: You can also use the toolbar search option by homology if you wish. |
3.6.4.6 Working with PDB Search Results |
Once you have searched for a PDB structure, a table with the search results will be displayed on the bottom of the ICM window. See the Tables section for more information on how to use ICM tables. See the next section loading your PDB file for information how to view the PDB file. More information about working with tables can be found in the Tables Section of this manual.
3.6.4.7 Loading Your PDB File |
- To load a pdb file double click on the search results table.
- Sort the table by right clicking on the column header. Other table manipulatio n options are described in the Working with Tables chapter.

3.6.4.8 Display PDB Header |
To display the PDB Header for a PDB file.
- First load a PDB file into ICM (see Load PDB)
- Double click on the word header in the ICM Workspace.
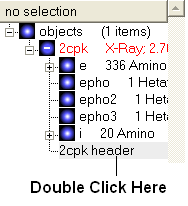
- The PDB Header information will be displayed.
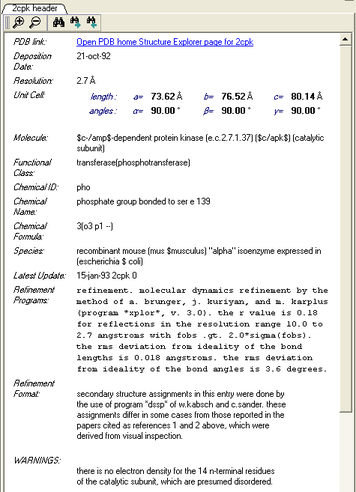
- Click on the blue hyperlinked text to link to external web pages for additional information if needed.
3.6.4.9 Converting PDB Files Into ICM Objects |
Sometimes it is necessary to have a PDB file in the form of a true ICM-object for which you may calculate energy, build a molecular surface and perform all operations. There are two ways of converting a PDB file into an ICM object.
OPTION 1:
- Right click on the name of the protein, displayed in red, in the ICM workspace panel and a menu will be displayed.
- Select ConvertPDB in the menu and the following data entry box will be displayed as shown below.
OPTION 2 a more rigorous conversion in ICM-PRO:
- Select MolMechanics/Convert/Protein and the following data entry box will be displayed as shown below.

Six options can be selected:
- Delete water molecules if you are not interested in them.
- Optimize hydrogens if you wish but this may take time.
- Delete the original PDB file and replace it with the converted ICM object.
- Undisplay during conversion will speed up the conversion procedure.
- You can display the final converted object if you wish.
- Running the conversion in the background will speed the procedure up.
3.6.5 Meshes Tab |
[ Surfaces | Meshes | Macroshape | Google 3D | Mesh options | Move/Resize | Mesh/Display | Mesh Clipping | Save Mesh | Occlusion ]
| Note: Click Next (top right hand corner) to navigate through this chapter. Headings are listed on the left hand side (web version) or by clicking the Contents button on the left-hand-side of the help window in the graphical user interface. |
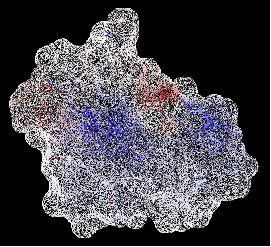
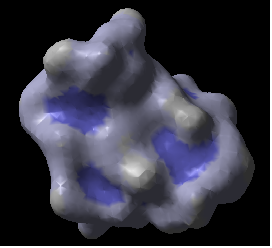
Click on the tab button entitled 'meshes' and three different graphical display tools are available for you to use. The three displays are surface, meshes and macroshape and are collectively referred to as meshes.

The benefits and applications of each display are described in this section.
Surface:
 Meshes:
 Macroshape:
3.6.5.1 Surfaces |
The surface of your structure can be displayed and colored by electrostatics or binding properties. To do this:
- Load a structure into ICM File/Open or tab-pdb{PDB Search}
- Convert the structure into an ICM object.
- Select the 'meshes' tab button.
The buttons and options you need to use are shown below:

First you need to decide by what parameter you wish to color the surface:
- Click on the drop down arrow menu shown below and select which parameter you wish to color the surface by.
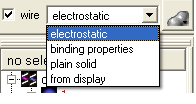
- Click the button next to the menu to color the surface of your molecule.
If you wish to have your surface displayed in wire check the 'wire' box next to the menu.
To display or undisplay the surface click in the box in the ICM workspace as shown below:
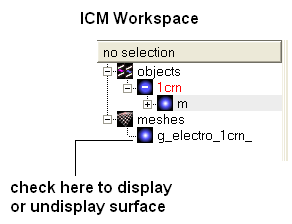
| NOTE: All surfaces, meshes and macroshapes come under the one heading of meshes in the workspace panel. |
3.6.5.2 Meshes and Macroshape |
A variety of shapes can be constructed using ICM. These shapes are referred to as meshes. The types of shapes you can build are shown below:
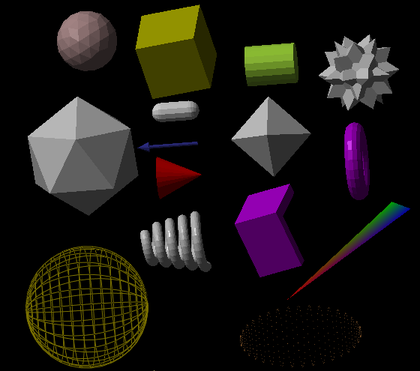
All the buttons for creating these shapes are shown here:
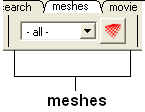
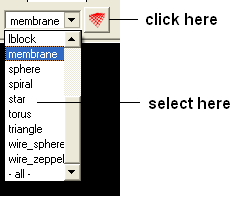
To make a shape select it from the menu by clicking on the down arrow and then click the button next to the menu. The shape will then be displayed in the 3D graphics window.
3.6.5.3 Macroshape |
A macroshape can be constructed and allows easy viewing and manipulation of the structural representation. A macroshape representation is ideal for large structures which allows the user to easily identify important regions of the structure and facilitate the return to the 'standard' view of a particular molecule. All the buttons needed to display a macroshape structure are shown below in the 'meshes' tab.
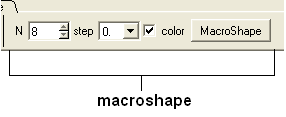
To construct a macroshape:
- Load a molecule into ICM File/Open or tab-pdb{PDB Search}
- Select the amount of detail required in the shape by increasing the values in 'N' or 'step' data entry box (note the default values are usually sufficient).
- Check the 'color' if you wish your molecule to be colored.
- Click the button labeled 'MacroShape'.
Macroshape can also be used from the View menu: View/Macro Shape
3.6.5.4 Google 3D Objects (Sketchup) |
To read in a 3D Mesh from Google in KMZ or COLLADA format:
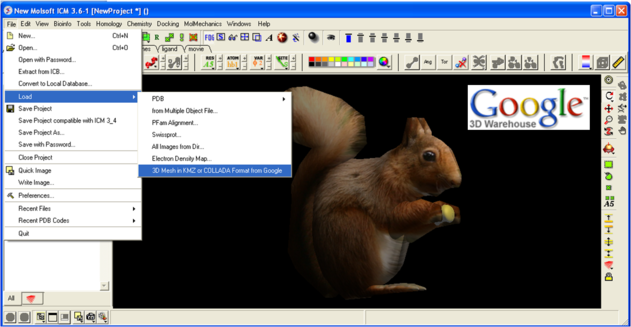
- File/Load/ 3D Mesh in KMZ or COLLADA Format from Google
- Search for the object you would like to view and download it.
- To read the file go to File/Open
An example of a KMZ file can be found in the distribution (a squirrel model by ilikipie, provided with author's permission).
- File/Open, and choose the squirrel.kmz file
3.6.5.5 Mesh Options. |
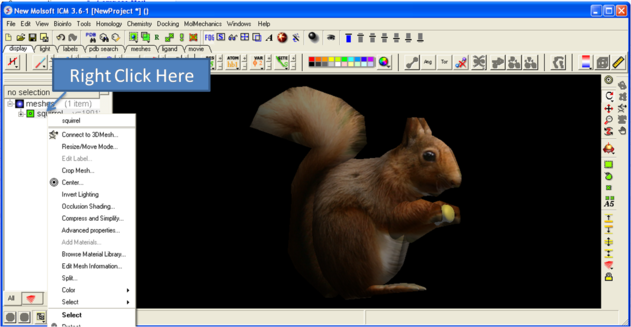
A number of options relating to meshes can be used by right clicking on the mesh in the ICM Workspace. This section describes some of these options.
3.6.5.6 Move and Resize Mesh |
Once a mesh has been created you can move it and resize it. To do this, locate the mesh you wish to either move or resize in the ICM Workspace and right click on it as shown below.
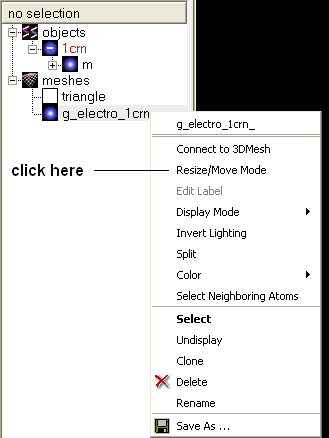
- Select the Resize/Move Mode in the menu.
A purple box as shown below will surround the molecule.
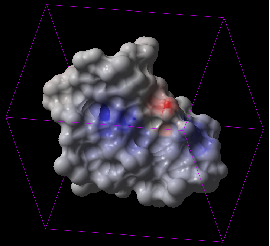
To resize the mesh click on one of the corners of the box and drag to the required size. The number displayed on the edges of the box represent the dimensions.
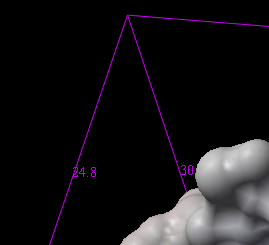
To move the mesh click on it with the center mouse button or selct the connect option.
3.6.5.7 Color and Mesh Display |
There are a number of options to color and change the display of the mesh. These options can be accessed simply by right clicking on the mesh name in the ICM Workspace as shown below.
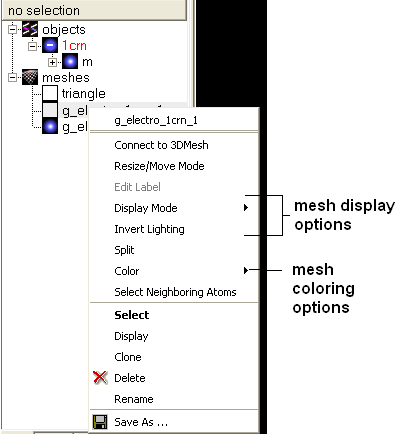
The lighting and display can be changed by selecting the options 'Display Mode' or 'Invert Lighting'.
There are five different display modes as shown below:
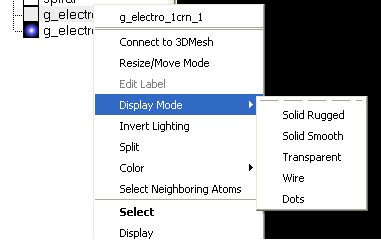
To change the lighting effects select 'Invert Lighting'.
The mesh colors can be changed by using the 'Color' option in the menu.
3.6.5.8 Mesh Clipping |
Clipping tools can be used to adjust the frames of the mesh independently of other objects.
The buttons shown below can be used for this purpose.
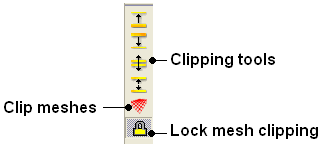
The buttons used for clipping are described in the section entitled Clipping Tools.
3.6.5.9 Save Mesh |
You can save a mesh as a wavefront object by right clicking on the mesh in the ICM Workspace and selecting SaveAs.
3.6.5.10 Occlusion Shading |
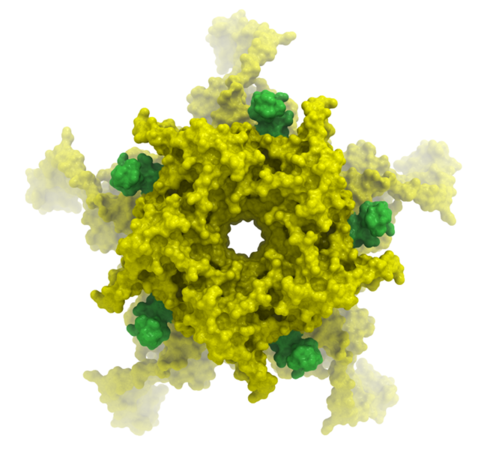
The occulusion shading option provides better representation of depth within a cavity. The color of each surface element of a grob (mesh) is changed by mixing its own color with the background depending on the burial of the surface element
To add occlusion shading:
- Right click on the mesh in the ICM Workspace and select Occlusion Shading.
- Enter a depth value - default is 0.8. Higher values will generate a more dramatic shading.
3.6.6 Movie Tab |
The options in this tab are described in the View Defined Movie Making section of the Movie Making Chapter.
| Prev Windows Menu | Home Up | Next How To Display |